Showing posts with label Photoshop. Show all posts

Sunday, June 8, 2014

My Sister's Garden - Part 2

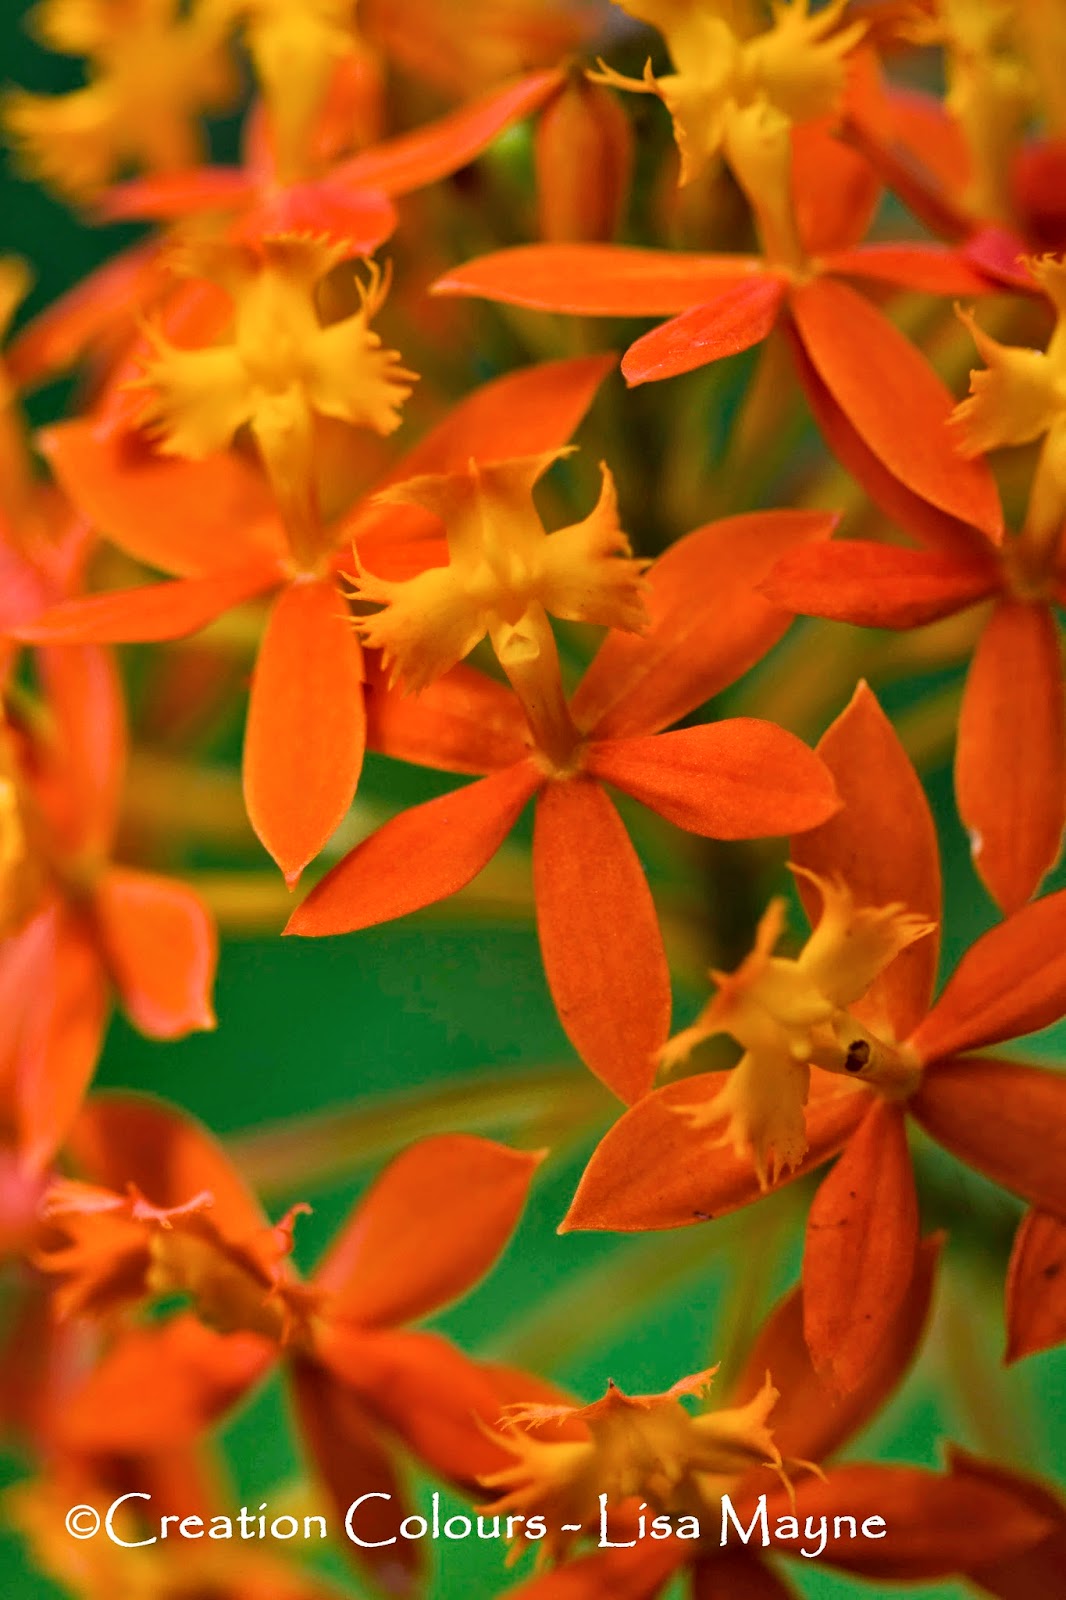
Still on the flowers in the garden camera rampage, I set myself the challenge of the crucifix orchid. These are small flowers that grow in a round bunch. By focusing on one, and in particular one head, I was able to have some success. I did need to play with the in Photoshop a little to get the colours right.

Canon EOS 50D, f/2.8, 1/640, ISO 100

Canon EOS 50D, Macro lens, f/2.8, 1/200, ISO 100 100mm
Two different styles are above - one within, one standing out from the bunch. Both have their merits. If it wasn't for the dead flower in the second one, I would prefer it because it has a little bit of light flowing in from the top left corner. But I do like the top one, within the bunch, with one flower in focus.

The next is bougainvillea. These guys are everywhere but that doesn't diminish their beauty. They are fascinating because their petals are very leaf like and  they have remarkable shapes. I did enjoy shooting them even if I had to work around them very carefully!

Canon EOS 50D, Macro, f/2.8, 1/250, ISO 100, 100mm

Canon EOS 50D, f/2.8, 1/200, ISO 100, 100mm
 The colours in these was really tricky to hande in photoshop and I think these came out a little, well, to use the technical term, splotchy. They were too dark - why are my photos always too dark? - so not enough detail was captured. Still, they are impressive pieces of nature. It just goes to show that me and my camera are no match for the creator!

Finally, there is this photo. I have included this to remind myself that beauty is not only found in flowers. Leaves are beautiful too!

Canon EOS 50D, Macro lens, f/2.8, 1/250, ISO 100, 100mm

Saturday, August 3, 2013

Chasing Egrets

I’m not one for patience when it comes to photographing wildlife. I have a rule – if you can’t sneak up on it, don’t bother. This is because whenever I do bother I manage to scare the animal, bird or insect away. Rule one basic photography – anything that moves is difficult!

I rely on the ‘right place, right time’ principle. And luck. Not a lot of it comes my way to be honest.
We took a little adventure on the weekend to a waterhole by the highway. One of those places that exist in the realms of mud-maps with ‘turn-left-at-the-jerry-can’ directions.

So, the gorge was gorgeous, and we were spoiled with a wildflowers and bird-life. Several flew overhead, hid behind rocks and dove for fish. Of course I was waiting for my husband who was busy spraining his ankle, so I decided I might just do a bit of bird chasing.

Let me tell you how this normally goes: Bird flies over, lands just out of reach of the 200mm, I stand quietly, reach for the camera…and the bird flies away. If I am lucky enough to have the camera on me, is sneak, then snap, snap, snap while whatever I’m photographing flies, runs, scampers away. Normal results are nothing.

This particular day however, a couple of egrets flew over. After two attempts of sneaking up, I kept the camera close by. One of my snapping sprees yielded this. 

Canon EOS 50D f/5.6 1/6400 shutter ISO 500 +1 setp 150mm. Cropped. Shutter Priority
 The cropping diminishes the quality, which is a shame. It has been heavily cropped, and colours slightly edited and enhanced in Photoshop RAW.

Saturday, July 13, 2013

Pirate Panoramas

Arrr, She’s at it again!

I finally have a weekend where I can sit down on a Saturday morning, drink my coffee and edit my photos. Unfortunately I haven’t been out much taking photos lately. To tell you the truth, I’m struggling to find new inspiration. There are only so many times you can climb the Karratha Hills and take photos of the sunset!

Last month I had the opportunity to go out on a charter boat to some of the islands of the Dampier Archipelago for a social function. Of course I took Betsy with me, despite the threat of rain. I must confess, I took some okay photos of the local rock art, but I am unsure of whether or not it is appropriate to post them on here. You may see those pop up in the near future, but for now I will focus on the shots I took of a place called Pirate Cove.
We climbed the rocks and there were some amazing colours. I’d wager you would be hard pressed to find these colour combinations anywhere in the world – Iron rust red, sandy yellow, ocean blue, mangrove green, black and grey all contrasting stunningly with the turquoise water. It’s spectacular.I was left behind by the group at one point (this is actually a frequent occurrence!)

This series shows some experiments – and that there are a number of ways to skin a cat.  Some are better than others. All edited in Adobe raw, with presets for the stitching, they still don’t quite fit together which is unfortunate. The sun just didn’t do as it was told! Which one is your favourite?

Also bear in mind I was clambering over unstable rocks…in bare feet. Real smart.

Canon EOS 50D (Betsy), f/3.5 1/800 sec ISO500, +1 step exposure bias, 18mm. Auto white balance, Shutter Priority mode. Five portraits stitched in Photoshop. Edited in Adobe RAW to enhance colours


Canon EOS 50D (Betsy), f/3.5, 1/8000 sec shutter, ISO 500 , +1 step exposure bias, 18mm, shutter priority. Two landscapes stitched in Photoshop. Edited in Adobe RAW to enhance colours.

Canon EOS 50D (Betsy), f/3.5, 1/8000 sec shutter, ISO 500 , +1 step exposure bias, 18mm, shutter priority. Two landscapes stitched in Photoshop. Edited in Adobe RAW to enhance colours.This is slightly crooked. Oops.

Canon EOS 50D (Betsy), f/3.5, 1/8000 sec shutter, ISO 500 , +1 step exposure bias, 18mm, shutter priority. Two landscapes stitched in Photoshop. Edited in Adobe RAW to enhance colours.This one will annoy you when you see it. I'm not going to point it out. But it's annoying. Very annoying.

Friday, April 19, 2013

Lesson #7: Long Exposures - second & third attempt at star trails

As promised, I attempted a few star trails in my travels over Easter. These suckers are difficult. This is the first time I have found myself wishing for a film camera. Apparently it's easier.

As part of the .com generation, if I don't know something I Google it. Google is a verb, in case you are wondering. According to my extensive research (Wikipedia and photo forums) taking star trails with a bulb setting on a digital camera makes the camera prone to a lot of noise. Coupled with this, the sensor gets hot, creating pixel hot spots - the RGB dots that confused me last time. (A bulb setting is opening the shutter indefinitely to capture movements of light in low light conditions)

The digital technique - the consensus on the Internet was - to take a whole bunch of 30 second exposure shots, one with the foreground lit up, and a complete black one to reduce noise and then stack them in your processing afterwards. This is a long time to wait if you want long star trails, so I only have four attempts to share. I used the stacking method in Photoshop CS4. I was happy with the results, and learnt a number of valuable long exposure star trail tips:

  1. Have a full battery - My battery ran out while attempting this at Karijini. It's OK, I had a spare, but not enough to waste on a shot that 'might work later.'
  2. Have an empty CF card - I did have enough space but only because I shot in JPEG. It also helps to have a good quality card that will write the photo information quickly.
  3. Remotes are gold - This means the shots are taken as close together as possible with as little break in the trail. I set the camera on continuous shooting and just pressed the remote button and left it at that.
  4. Use a warm light when lighting the foreground - I only had an LED torch which as you will see, came out very cold. 
  5. Do this on a still night with no clouds and as little light pollution as possible (including the Moon) - The moon interrupted the Karijini shot, and I got some interesting photos of lightening under stars, but the trails peter out. My final test wast interrupted by clouds, and therefore you can see breaks in the trails.
First attempt at Karijini. Either the tripod wasn't stable or the Image Stabilizer hadn't been turned off on the lens, but the trails are crooked. Plus you can see the light pollution from the Moon.


This is quite cool - I got a shooting star effect! Below the stars is where a fence was, but you can see how over time the moon came up and the stars faded - giving the shooting look.

Demonstrating the cold light of LED torch, as well as the importance of a still (meaning, no wind) night. There were also clouds that broke the trails.
This is the best of the four - taken at an increased focal length, which I think helped the clarity of the trail. Funnily enough the increased focal length was due to the storm in the distance - for lightning photos, see my Facebook page!

Sunday, April 14, 2013

Mysteries of Misty Waters in Karijini

As promised, a second edition on the Karijini expedition. The jury is still out on the third. This trip was surprisingly good for water shots, despite the incredibly bright sun. Once down in the shade of the gorges, and the sun had started to disappear, water shots were so much fun to take. There is something so satisfying about setting up a shot, leaving the shutter open for a few seconds, and eagerly checking the LCD screen to see if the water is misty while the rocks are crystal clear.

Can I just say, I am so glad I do not have a film camera for water shots? Star trails - different story. I learnt so much from shot to shot - composition, timing, reducing camera shake, or in my case, tripod shake. Some of these things you just don't know with film until they are developed!

Once you have the settings done for a particular gorge, you can go from little run of water, to small waterfall, to bigger waterfalls, composing shots and taking misty water photos. I say again, it is so much fun. What would you do down those gorges without a camera I ask you?

The other thing that was really valuable from this trip is the amount I shot in RAW and had to process later. Only then did I realise I had the white balance wrong for a lot of my water shots, and it needed to be corrected in Camera RAW (a lot of my water had an odd blue tinge).

Check out some of my water shots below:


Handrail Pool, Weano Gorge Karijini NP. Canon EOS 50D (Betsy), 1 second shutter, Manual program, f/14, ISO 100, 18mm focal length. Increased contrast, vibrance, saturation in Camera Raw. Also slight warming with magenta tint.
Handrail Pool is a great spot in the park, although it is precarious going down the rail you see to the right, carrying camera gear. It's amazing this shot looks so peaceful, there were backpackers jumping off rocks on the other side! This has got to be my favourite shot of the trip. I know I said that last time about the spider, but you go to Karijini for the gorges, so this trumps a golden orb any day!

I've had people say, why not just Photoshop the rail out of the photo so it all looks natural? Well, one, that would be extremely fiddly and I think difficult (too much like hard work) and two, it's called Handrail Pool for a reason...

Dales Gorge, Karijini NP. Betsy again, with EF-S18-200mm lens set at 50mm. 1/4 sec shutter, f/25. Much the same RAW edits as above - warming and magenta tint, contrast, vibrance and saturation adjustments.
This was quite spectacular. We went down Dales Gorge hoping for some interesting light options at sunset and were rewarded with good conditions for water photos plus some really great golden reflections. I promise you, the gold has nothing to do with Photoshop. This was taken at the top of Fortescue Falls, but I thought, if I call this photo Fortescue Falls everyone is going to look at me like I'm crazy!

Knox Gorge, Karijini. Betsy once more (I only have one!) set at 18mm focal length. F/22, 2 sec shutter. Increased contrast, saturation and vibrance with a magenta tint in Camera RAW.
Just as above, the blue has not much at all to do with Photoshop (it may be slightly enhanced) - Knox Gorge really is blue in parts! This is a good example of smooth running water and gives a good indication of the terrain we were carrying camera gear over! But in all seriousness - blue rocks and purple rocks. Really impressive.

Cascades in Knox Gorge, Karijini. Canon EOS 50D with my Nifty Fifty (EF 50mm f/1.8 II), 0.8 sec shutter, f/22, ISO 100. Contrast, brightness, white balance adjustment as well as vibrance and saturation for two photos before stitching in CS4.
I realised on this trip that while the EF-S18-200mm is a brilliant all rounder lens for traveling, it does not specialise well. It's a pretty good zoom in a tight spot and the wide angle does capture a good landscape, however I do tend to miss out on those crystal clear shots. So I complemented it with my Nifty Fifty - this is literally the cheapest Canon lens you can buy. And I love it. It will take some time to master, but it's F-stop can go all the way up to 1.8. Brilliant. It doesn't give you great depth of field for landscapes usually, but I thought I would try it for some of the water photos in Knox Gorge to try and get increased sharpness. Above is the resulting photo - it's actually a panorama. I learnt to edit these RAW images by processing the first image, setting a preset of the settings so the second is processed exactly the same before stitching together.

You may have noticed a lot of talk about editing in Camera RAW in this post, and the captions on the photos indicate pretty much all my photos are edited slightly. I read once that all digital images usually require at least some tweaking in contrast and brightness. But for some purists, I may need to defend myself. When capturing a RAW image what you are actually doing is capturing a digital negative - that is, all the information collected by your camera's sensor. You then need to process them on the computer and it is not much different to developing a negative (not that I have ever done that - I'm pretty sure there are at least a few more controls...). All I really change is the contrast, brightness, vibrance and saturation. For my Karijini photos I warmed up the white balance and increased the tint to the magenta side for most photos to capture as many colours as possible. I will give you an example of what this does below:

Fortescue Falls, Dales Gorge Karijini. Betsy, at 18mm on tripod, 1/4 second, f/22, ISO 250.
This is the unedited version of this shot. One of the last I took before we headed up to the top of the gorge for the sunset. It is dark and the white balance is incorrect. Below is the processed version.


Same shot, only the colours have been corrected by adjusting the white balance and it's brighter and clearer. You particularly notice it in the water - the water has a slight blue tinge in the first shot, and is white in the second.  Could I have done this with my camera on the day I took the shot by adjusting settings? Good question. I like to think not as it was a custom white balance I set on the computer - I already have my camera set to capture slightly saturated images and as I said before, my 18-200mm lens is great at everything but a master of nothing. With more time and fiddling, I could have set a custom white balance on the camera that day, but when you are standing precariously on wet slippery rocks, with your camera pointing down this waterfall and you have to let it go for a few seconds - you want to make as little adjustments as possible!

As I understand it, it is no different than photographers who used to develop their own negatives and get all arty-farty with contrast and colour. Occasionally I mess with hues and gradients but with digital editing I have come to realise that less really is more.
Sunday, March 17, 2013

Thrill of the Chase

There are some photos you have to be there to quickly capture the moment, and then there are some that you have planned in your head, waiting for the right moment to present itself, telling yourself you will be ready when that happens. This weekend I was able to chase after one such photo.

I was riding my bike yesterday afternoon, testing out our new GoPro (post to follow) when I noticed the clouds had the potential to contribute to a terrific sunset, one that turns the whole sky red. I had a vision of a photo down on the salt flats were someone, I'm not sure who, probably a bunch of different people, have placed different pieces of 'art' in the ponds for the salt crystals to grow. This is along the highway between Karratha and Dampier. The Rio train runs behind it, with the setting sun in the background. One of the art signs spells 'Karratha' with sharks circling and a lone hand reaching for the sky...I'm not sure what it's supposed to symbolise but it adds character.

So with the promise of a spectacular sunset I abandoned the curry I had cooking at home, left my husband to great our guest coming for dinner that night, and...followed the speed limit...down the highway to salt flats where I pulled over and started clicking madly away. An ore train was passing as I got there, which gave me the opportunity to include it in the shot.

Chasing after photos you have thought about for a long time - they never work out as you imagined. But still, I thought they came out alright, even if they aren't up to a 'pro' standard...

You can see how the shape of the clouds got me excited!


 Our 'public art'. This is the shot I was planning, although in my head you had more clouds and the sun just behind the train...I guess nature just didn't get the message.


I took a couple. I played with the colours a little bit in Photoshop - the actual colour is somewhere between the purple and the green. Still learning how to run that RAW editor!

My verdict? It won't be the last time I'm on those salt flats - I've still got the Loch Ness Monster, the Titanic, the man and the kangaroo to snap! The salt flat itself is challenging because of the way it reflects the colours. After this exercise I think I'm better off trying to take the photo first go, rather than messing around with them in Photoshop. But hey, isn't it all about the thrill of the chase?

I'm also pleased to report that while pulled over I was only honked at once!

Until next time Amigos! (and watch out for the GoPro post...)